Free Sosuke Aizen Mirrors High guide: compare Standing at the Top’s entry buff with its team Switch cooldown cost before drafting a rotation.
The official October 29 introduction remains subject to change. This is an observation plan; no independent live-build playtest is claimed.
Sosuke Aizen Mirrors High: published effects
| Published effect | Initial | Final |
|---|---|---|
| Field-entry Attack increase | 22% for 20 Counts | 34% for 20 Counts |
| Added remaining team Switch cooldown | 12 Counts | 7 Counts |
His Skill gives Attack +40% for 10 Counts. Its listed type is Special and its Attack Category is a dash. Arts 1 is Physical, Arts 2 is Spiritual, and the Mortal Blow is Physical. These are published kit fields, not measured damage results.
When does Sosuke Aizen’s Mirrors High switch cost matter?
An opening buff is attractive because it supplies a clear moment to investigate. The team cost makes the decision more interesting than comparing the largest Attack percentage. Before choosing Aizen for a specific encounter, identify what your next switch is supposed to accomplish. You might want to bring in another attacker, respond to danger or activate a teammate’s condition. Those are possible planning needs, not claims that any particular sequence is optimal.
Write that intended switch into your notes before the attempt. If it is unavailable when you need it, record the lost opportunity alongside any useful offense. A favorable opening hit cannot tell you whether the full team benefited. Conversely, an encounter that lets your active character remain productive may make the drawback less disruptive. That possibility needs observation in the relevant fight rather than a universal tier label.
Two rotation questions to choose between
Pressure question: can Aizen complete the actions you intend while staying active? Record interrupted actions and time spent avoiding danger, as well as connected attacks. Recovery question: can the teammate you need become available when your plan calls for a change? Record the intended switch separately from the actual switch. Pick the question that reflects the problem you are trying to solve. These are alternative observation goals, not two teams with claimed performance results.
For either question, compare a similar encounter state. Entering after a different enemy pattern or with a teammate already in danger changes the situation you are evaluating. A useful note explains those differences instead of compressing them into a single “good” or “bad” verdict.
How do you compare initial and final stages fairly?
Check the ability text actually available on your account. Use the ability-stage guide to keep source stages separate. Do not price an investment decision around a later state while recording observations from an earlier one. The same discipline applies when another guide, video or screenshot omits its stage.
For your baseline, record the game version, exact variant, unlocked stage and encounter. Keep equipment and teammates stable when you can. If an upgrade changes several things at once, list those differences rather than attributing the entire result to one line of the kit. No upgrade cost, intermediate progression curve or resource-efficiency calculation is established here.
What should you observe during the field window?
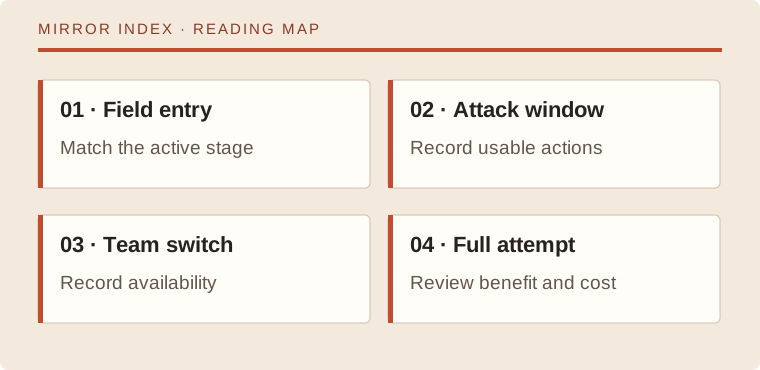
- State the question. Choose one concrete issue, such as whether your intended teammate can enter before a dangerous enemy sequence. Avoid changing the question after seeing a favorable result.
- Record the entry state. Note which character was active beforehand and the visible switch availability. Preserve the game’s displayed unit instead of substituting seconds.
- Record useful actions. Note which actions connect, which are interrupted and whether movement or defense consumes the window. A buff being available does not show how much useful work happened inside it.
- Record the next switch. Write down when you wanted it, when it became available and whether the delay affected your plan. Include attempts that fail.
- Change one decision. Try a different entry moment while keeping the encounter and other conditions comparable. Compare the whole attempt before drawing a personal conclusion.
This is a blank observation method. We supply no simulated attempts, measured completion rate or recommended sample size disguised as evidence. Your record should retain uncertainty when attempts differ in execution or enemy behavior.
How should you interpret an Aizen observation?
If the planned switch is available and the actions still fail, investigate the actions or encounter before attributing the outcome to the cooldown drawback. If the switch is unavailable, describe the missed opportunity: which teammate you wanted, what that teammate was meant to do and what happened instead. If you cannot see the relevant state clearly, mark that part unresolved. These descriptions make the next change easier to choose without inventing a damage score.
Keep the question narrow when comparing the initial and final source states. A smaller printed drawback is relevant to rotation planning, but an account upgrade can also change other available effects. A clear record distinguishes the source comparison from your own account comparison. Use the former to decide what to observe, then use the latter only within the conditions you recorded.
Which shortcuts would give a misleading answer?
Do not add the displayed percentages into an asserted total damage multiplier. The introduction does not establish the stacking formula used by a complete combat calculation. Do not convert Counts into seconds without a verified timing rule. Do not treat a Special Skill as another damaging hit just because it appears among Action Cards.
Also match the attack you are evaluating to its own category rather than giving the whole character one damage label. If a teammate or target condition matters, consult the status-effects guide and verify the actual condition in your encounter. This page does not establish enemy resistance or a best partner.
Where can you take this decision next?
The team planner and character comparison currently cover the original 13 sourced kits and do not offer Aizen as a selectable character. Use them to inspect the roles and conditions of those available teammates, then keep your Aizen observations separately. A manual note is more honest than presenting an unsupported tool result.
Revisit the official character introduction when checking a disputed field. Our editorial method separates published information from interpretation. A future ranking or tool entry would require its own reviewed integration; this guide alone supplies neither.