Free Mirrors High status effects guide: trace 6 kits from ailment application to the required action and the character or team that benefits.
Source scope and testing limits
Source check: October 30, 2026. The official introductions below were published October 23 and remain marked subject to change. This is a reading and observation guide, not a tested rotation or a complete status-effect database.
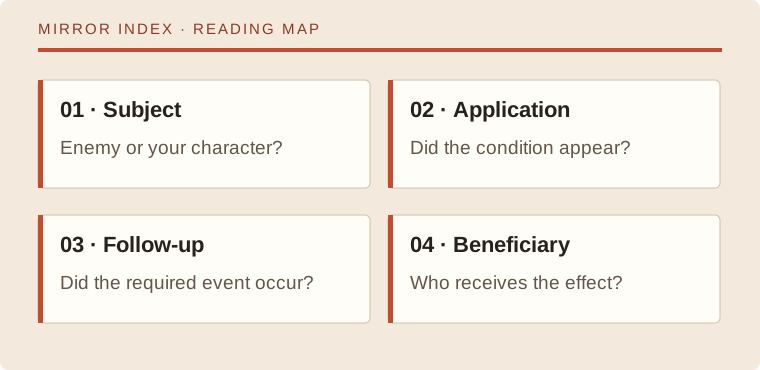
Mirrors High status effects: who needs the ailment?
Read the subject of the condition before choosing a partner. An enemy carrying Poison and your attacker carrying Poison are different situations. A kit that applies an ailment is not automatically a partner for every ailment-dependent character. Start with this map, then match the exact variant and ability stage to your game.
| Published character | Condition to inspect | Benefit or follow-up | Source |
|---|---|---|---|
| Rukia — Squad 13 Lieutenant | Attack a foe that already has a status ailment. | Team critical support; her Skill provides Bind and Mortal Blow provides Freeze. | Official Rukia introduction |
| Byakuya — Squad 6 Captain | The enemy has Bleed when Arts 2 connects. | His innate effect can apply Bleed through Arts; the matching follow-up receives a damage bonus. | Official Byakuya introduction |
| Mayuri — Squad 12 Captain | The target is Poisoned when his Skill is used. | The Skill adds a further Physical Defense reduction. His innate Arts effect can apply Poison. | Official Mayuri introduction |
| Bambietta — Schrift “E” | The enemy is burning during the Arts 2 follow-up. | Her innate Arts 1 effect can establish Burn; Arts 2 benefits against that condition. | Official Bambietta introduction |
| Grimmjow — Espada Number 6 | Grimmjow himself has a status ailment. | His Attack benefit is self-conditioned. The final stage separately describes an immobilizing-ailment trigger. | Official Grimmjow introduction |
| Uryu — Quincy | Uryu himself is Poisoned. | His innate Attack and Arts 1 bonuses require that specific condition, rather than an afflicted enemy. | Official Uryu introduction |
How do you trace a missing Mirrors High status bonus?
- Application: identify the action intended to create the ailment. Check that it actually connected and that the condition appeared. A listed chance is not a guaranteed result on every hit.
- Trigger: identify whose condition the ability checks and the required action. An application attempt, an afflicted target and a successful follow-up are separate observations.
- Benefit: check who receives the effect and whether the relevant action occurs during its window. A team critical bonus, a personal Attack bonus and an enemy defense reduction answer different questions.
For a Byakuya observation, record Bleed application separately from Arts 2. If the first event is absent, investigate application before changing the follow-up. If Bleed is visible but expires before Arts 2 lands, investigate timing. If both occur, check the ability stage and comparable conditions before interpreting a damage difference. This diagnostic order is editorial advice; it is not a measured account result.
Choose the next check from what you actually saw
No ailment visible: first confirm the intended action connected, the copy matches the source and the relevant ability is available. Ailment visible, follow-up missing: inspect action order and the point at which the ailment disappears. Both visible, benefit unclear: check the effect’s recipient and the action category you are comparing. Those three observations lead to different questions, so do not treat all of them as “the bonus failed.”
A screen capture or written note can establish what you observed in that attempt. It does not establish an unseen internal rule. If the available interface does not show enough information to separate two explanations, keep both explanations open and identify the extra observation you would need.
Chance and ability stage change the plan
Byakuya’s introduction lists a 30% Arts-hit Bleed chance initially and 50% at the final innate stage. Bambietta’s Arts 1 Burn chance uses the same initial/final percentages. Those are separate character conditions, not evidence that either effect will apply exactly once in every two attacks. A short run can differ from the listed chance.
Do not combine repeated attempts into a probability calculator without verified rules for eligible hits and independence. Likewise, do not infer actual damage by adding every displayed percentage. Read the ability-stage guide before comparing your copy with a final-stage example.
A source can suggest a question without proving a team
Mayuri’s enemy-Poison condition suggests investigating whether an afflicted foe creates Rukia’s support opportunity. The useful next question is whether the expected condition and subsequent action occur in your encounter. Their introductions do not by themselves certify a rotation, boss susceptibility or best team.
The same reasoning prevents a misleading pairing claim about Uryu: poisoning an enemy does not establish that Uryu is Poisoned. His Mortal Blow description states self-damage over time; that text alone should not be relabeled as a verified self-Poison application. Keep the observable condition separate from a similar-looking health change.
What makes a Mirrors High status-effects note useful?
In the team builder, write one question in the notes before playing: “Did the intended ailment appear before the follow-up?” Record the game version, encounter, exact variants, ability stages, action order and both successful and failed applications. Keep other investment and teammates comparable when changing one variable. The tool stores your notes locally; it does not validate them as site-wide test evidence.
If a condition fails, keep that result rather than selecting only the most favorable attempt. Possible explanations include a missed action, a different stage, timing or encounter-specific behavior; one failure does not establish a universal immunity. For another identity check, consult the Sosuke Aizen character record. Use the editorial method to distinguish a source fact, your observation and a broader conclusion.